There is nothing as tiresome as a wall that starts to bulge after a few years. Using these tips and tricks, you are assured a wall that will remain attractive long into the future. Benders’ information is free and is not to be regarded in the same way as, for example, an authoritative construction drawing. Nonetheless, the information is of great use in all relevant building projects.
1. Start with pen and paper
Try to sketch out your ideas of the finished result. It may be wise to use the assistance of a garden designer. With a little preparation, you can plan efficient wall building without lots of block or stone cutting. You can also avoid unnecessary mistakes. So that everything goes nicely together, take the opportunity to also sketch in your paving stone surfaces. Consider how corners, steps and curves affect your overall design. Carefully read our user instructions and, if anything is unclear, ask your local distributor. Next, measure and mark out where the foundations are to be. Extra pre-planning is important here, especially with sloping ground in conjunction with a raked retaining wall. After all, certain walling systems step slightly inwards with each course.
2. Start correctly
Start by digging out a sufficiently deep and wide trench for the wall’s foundations. If the terrain slopes, start at the lowest level. Next, lay fabric sheeting on the trench bottom and start with a drainage layer that protects against frost. Drainage pipes should also be used. These must be located under and behind the walling stones and have an even drop that leads water away from the wall. Fill with a base course of crushed rock (grade 0 – 32 mm) or similar. Use a compactor (plate compactor) to compress the foundation courses. After that, level off with an approx. 30 mm thick fine bedding layer of stone dust or stone chippings. At least 10 percent of total wall height should be below ground level.
3. The crucial first course
Place the first course of walling stones on our Grundbalk, a paving slab, cast in-situ footings or directly on the bedding layer. Next, fill with a drainage layer of 8 – 16 mm fine crushed stone (or similar) behind the wall to a width of 15 percent of the wall’s height (but no less than 150 mm). Backfill to ground level at the front of the walling stones too. Use a spirit level to check that the first course is level or, if it is a retaining wall, rakes slightly in towards the slope. This is so that margins can be maintained when compacting the fill behind the wall. To ensure perpendicularity when building a straight wall, stretch a string down the back of the wall.
4. Do not forget geogrid
As a fill behind the drainage layer, you can use the same material as you use for the foundations. To fill and compact each layer, use a light plate compactor (max. 80 – 125 kg). Use it carefully and not so near the wall that the wall moves. If you are using geogrid for your retaining wall, the bottom geogrid is most often to be placed between the first and second course of walling stones. A rule of thumb is that a walling system is self-supporting at three times the wall’s width. Thus, a 200 mm wide retaining wall can be built 600 mm high without the need to reinforce with geogrid. The length of the geogrid in the sloap should be as long as the hight of the wall. However, if the ground behind the wall slopes or is subject to loads (e.g. vehicles of various types), geogrid must always be used. Tension the geogrid well and fill with materials so that the tension is maintained.
5. Check frequently
Continue to enjoy building your wall using a stretcher (running) bond with the stones offset by a half or a third of a stone. This overlapping ensures that the wall is stable. From time to time, use a ruler to check that the bond is not being displaced between the walling stones. Use a long spirit level or a spirit level and a straight edge to frequently check that the stones are still level. It is vital to do this throughout building. Grind away any unevenness or use thin, plastic washers/discs as shims. Additionally, use a brush to keep everything thoroughly clean between wall courses. The first and top courses, as well as corners, starts and ends, must always be glued. In certain walling systems, all stones are to be glued. The recommended glue is Bender Concrete glue.
6. Splitting wall stones
A concrete saw is often used to split walling stones. However, bearing in mind safety, it is often safer and quicker to use a block cutter. You can hire one from a machine rental company or a stone specialist. To bevel edges or remove any unevenness, a small angle grinder with a diamond grinding disc can advantageously be used. However, you must then use respiratory protection and safety goggles. For walling stones with a tumbled finish, a hammer can be used to soften up the sawn edge. If you backfill with soil at the top courses, fold fabric sheeting against the back of the walling stones and out along the backfill. This is to avoid material shifting and discolouration of the wall.
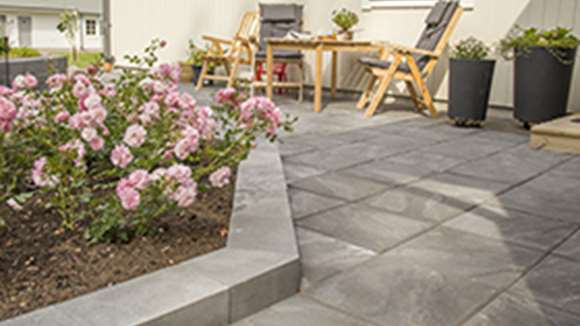
7. Attractive finishing touches
Of course, plants must also have their place in your new garden. Why not use ones that are green all year round? However, remember not to plant bushes and trees too near walling stones. As they grow, root systems can dislodge stones and entire walls. Post elements and post tops are also good ideas. The same is true of a coping course, e.g. Megatäck, Luxor top stone or one in Bohus granite. For sheer aesthetics, or for security, crown your wall with one of our Classic or Funkis fencing/railing systems.
These instructions apply to stable foundation installation conditions. However, they are still only intended as guidelines. Further technical advice may be needed in respect of geological variations in site and ground conditions.
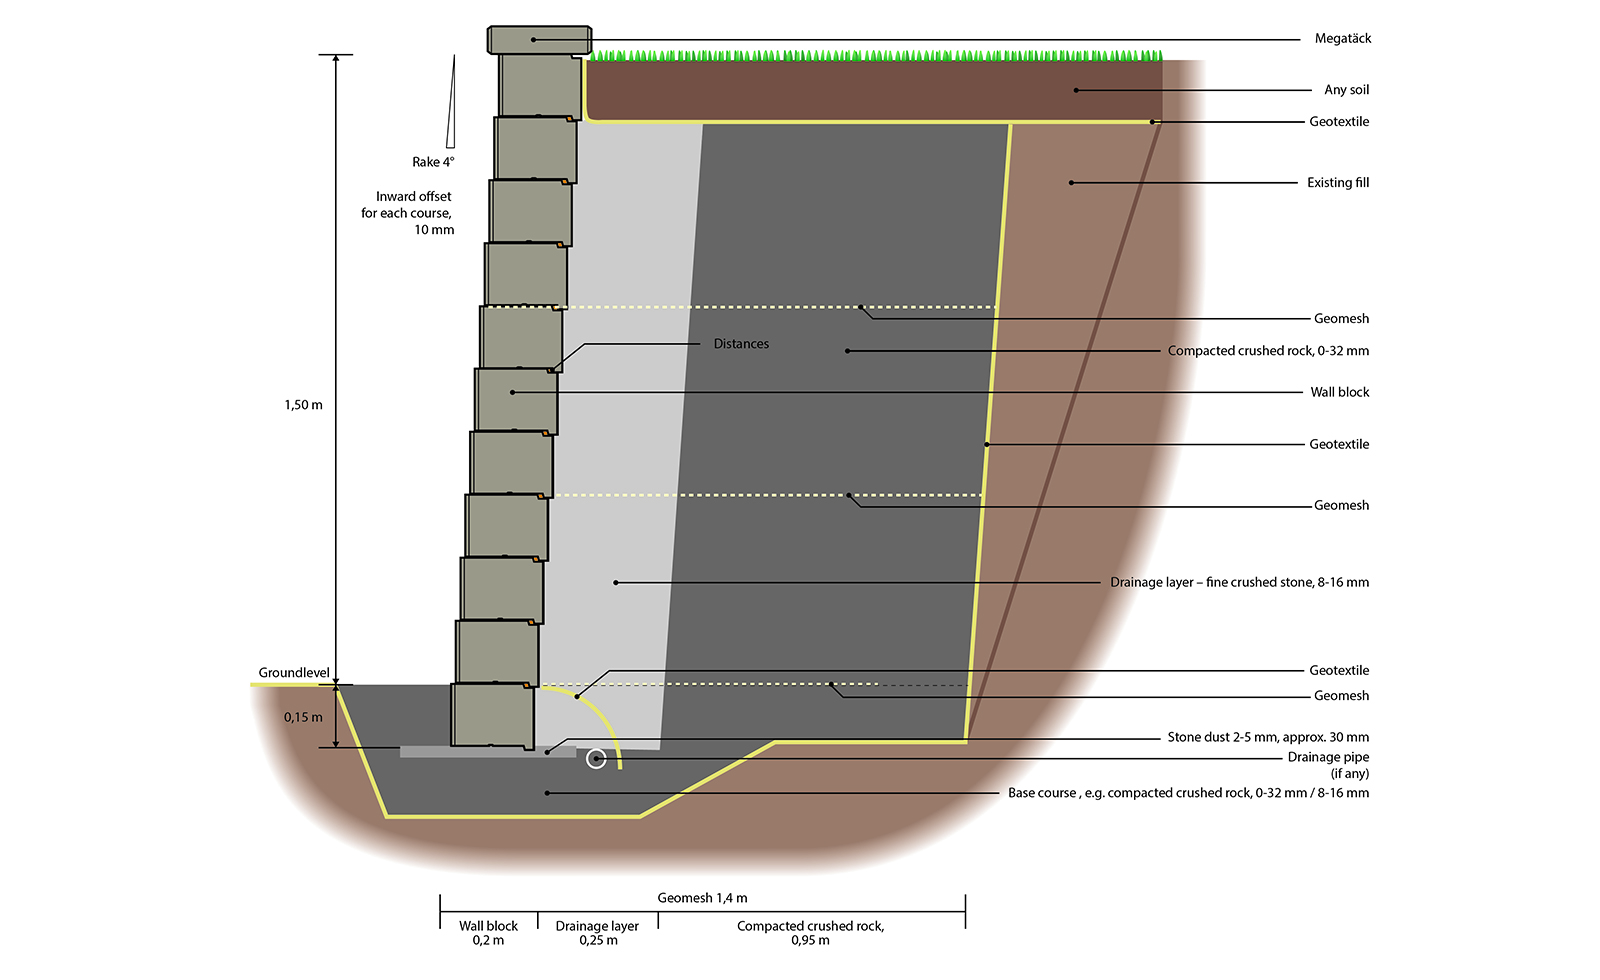
Figure text: This figure shows installation of a Bender Megasmart walling system.
For our complete walling accessory offerings, visit Benders’ walling system range page.
For amount of consumption use our wall calculator.